Miffy Cheesecake

Inspired by the spring season, we’ve created a recipe for a Miffy Cheesecake! Miffy’s cute silhouette paired with some edible flowers equals the perfect decoration for a cozy, cottagecore cheesecake.
Interested in the behind the scenes of this treat? Check it out:
Ingredients:
3-5 graham crackers
1 pack of 8 oz. cream cheese
1 egg
1/2 tsp vanilla extract
1/4 cup sugar
orange jam
white chocolate melts
edible food marker
edible flowers
Instructions:
Preheat oven to 325°F or 160°C.
In a small, circular tin or paper liner, crush up your graham crackers into a crumble. Flatten them with a spoon to make sure you have a thick, even layer.
Use our recommendation of 3-5 graham crackers to decide how think you’d like your crust to be.
In a bowl or electric mixer, beat cream cheese with sugar and vanilla until smooth. Then add your egg and beat once again until smooth.
Pour onto your crust and bake for about 20 minutes.
Allow cheesecake to fully cool.
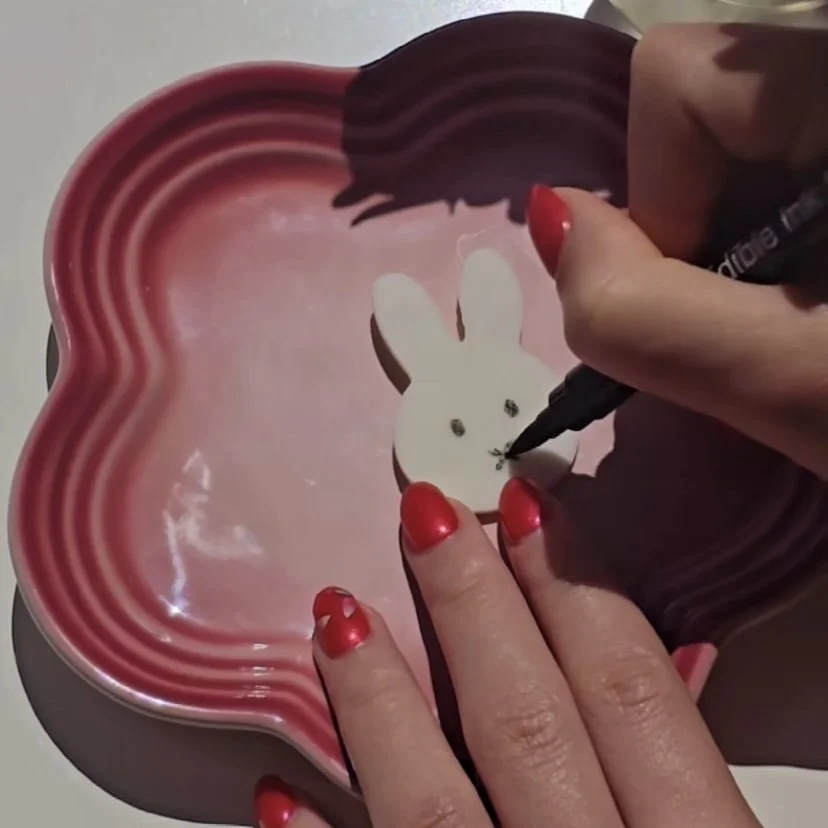
While waiting for cake to cool, pop a handful of white chocolate melts into your microwave (following time recommendations on the package). Once melted, pour chocolate into a bunny-shaped cookie cutter and let cool.
If you do not have a bunny-shaped cookie cutter, you can also pour the melted chocolate onto a layer of parchment, let cool briefly, and then cut out your best bunny head with a knife. This will work well depending on the type of chocolate you use, but to get a clean look (and mess-free clean up) we do recommend using a cookie cutter!
Once cool, use a black food coloring marker and start drawing! Don’t forget Miffy’s “x” mouth.
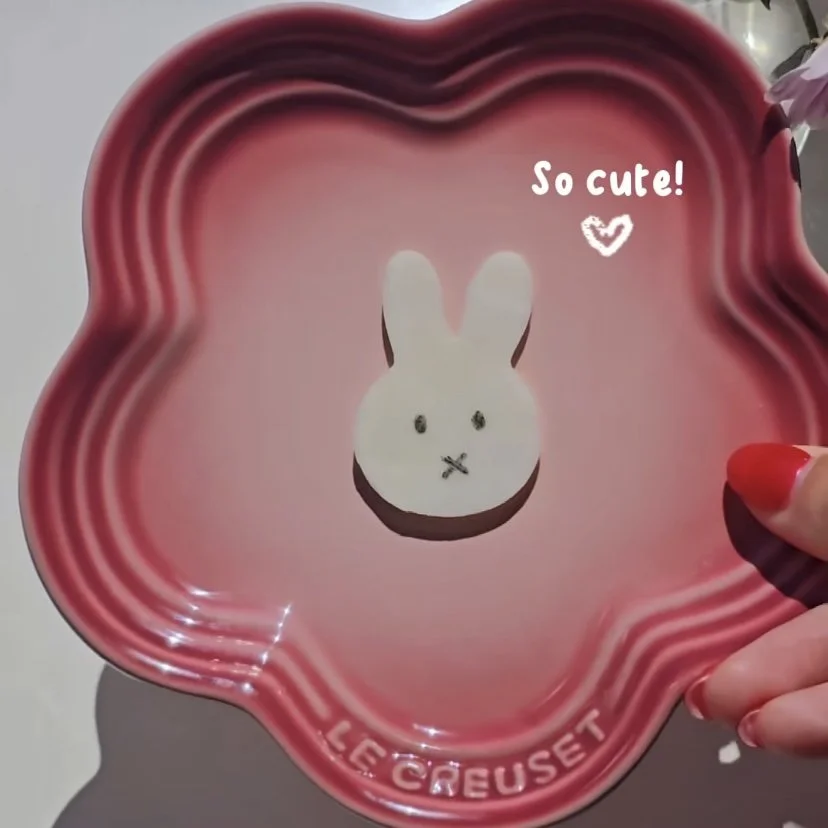
Once cheesecake is cool, spoon on an even layer of jam on top.
Does your cake have a few cracks like ours? No worries! Cheesecakes are notoriously delicate. We used jam to help cover blemishes, and our Miffy decoration will help conceal the rest of it later on.
Add in a sprinkling of edible flowers to your jam layer, then transfer your Miffy head to your cheesecake, delicately laying the decoration on top.
Refrigerate for at least 2-3 hours before digging in.
Voila! You’ve made your very own Miffy Cheesecake!